Showing posts with label Grow it yourself. Show all posts

Thursday, September 12, 2013

Clamshell Mushroom Toasts with Goat Cheese & Fresh Thyme

Richard and I are creatures of habit.  Especially in the morning. We wake up at 7am. We walk the dogs. Rich makes a french press of coffee and turns on the Today Show while I make open faced breakfast sandwiches. Then we eat, drink our coffee and watch the news in perfect sync. (Unless we are hungover or have that rare "Vicky Christina Barcelona" morning of either passion or pugnacity. Though we still squeeze in the coffee and Today Show.)

But, this morning, I shook our world up a bit. You see, we got our CSA delivered as we do every Thursday, but this week, along with the end of summer/ beginning of fall produce, we were given a little package of very cute (and kind of weird) mushrooms. I swear they were alien fingers wearing turtle shells as thimbles, but apparently they are called clamshell mushrooms.


What the hell do you do with clamshell mushrooms? Other than laugh at and photograph them?

Nobody knows! So, as with most things that I don't know what to do with, I put them on toast.

Breakfast sandwich OUT... Cute mushroom toasts IN. (Routine broken. Mind blown.)

good day, sunshine.


Ingredients:
Clamshell mushrooms, thinly sliced
1/4 sweet onion, thinly sliced
1 tbsp olive oil
Kosher salt and freshly cracked pepper
A few springs of fresh thyme
2 slices of whole grain bread
Goat cheese

Method:
Heat olive oil in a small pan over medium heat. Sauté sliced mushrooms and onion until caramelized, about 10 minutes. Meanwhile, toast the slices of bread and then spread goat cheese on them while they are still warm so that the cheese gets nice and melty. Season the mushrooms with salt and pepper, and pile them on top of the toasts. Sprinkle with fresh thyme leaves.

Have a lovely Thursday!


Tuesday, August 6, 2013

Summer Gazpacho & Summertime Lovin' Photo Blog

I was just looking through my phone trying to find some pictures from our garden this year. That way I could brag about how cute the Mr. and I are and how we (he) has such a green thumb and we pick our tomatoes while holding hands and blah blah blah. Then it hit me. "Sarah Keith...." I thought to myself because I always think to myself using my full married name.... "Sarah Keith.... why don't you just go outside and take some pictures of your garden for your blog?! Then you can show all four of your readers your beautiful and healthy plants and pretend that you made this recipe from them and them only... " 

But here's the thing. All of that super cute B.S. up above.... is exactly that. B.S. Our garden has been less than productive this year to say the very least. We had one amazing harvest mid June, but, unfortunately, our plants just couldn't hang this summer and all of the veggies that I used to make gazpacho from today are from Whole Foods. WHEW!!! It feels really good to get that off my chest. After all, honesty is the most important part of the blogger/blogee relationship. And honestly, sometimes my green thumb is well, just not. Even Rich's green thumbs (both of his are green... that's how good he is at plant stuff) couldn't keep up with the summer whirlwind that I have been this year. Who needs to water plants when you can pour another glass of rose down your beautiful wife's throat? (Yes, Gingers prefer rose, it's the ginger of wines.) What was I saying again? Oh right. I'm a distraction. Poor plants.

On a more positive note, it is almost time to rip up all of our terribly disappointing excuses for plants and replace them with fall crops! Sweet potatoes, beets, carrots, brussels sprouts... you name it, it's getting planted and will be very well documented (dead or alive) for your viewing pleasure. I have the cutest gardening gloves (and freckles), so an excess of photos will be necessary. Which brings me back to where I started in this crazy, rambling mess of a blog post. 

Photos. I love them and thought this would be the perfect time to share some gems that have been lost in the summertime shuffle. 


Holy Instagram addict  What am I going to swoon over when summer is over?! Gah- love it. But alas, the days are unfortunately starting to get shorter and tomatoes starting to get a little less juicy and I am going to squeeze every ounce of summer in until I break out the Christmas decorations. (We decorate for Christmas the day after Halloween.)

Wow, this has seriously been the most rambl-y blog of all time. My brain may still be mush from the weekend. Ok. "Sarah Keith... get it together." It's time for a recipe. It's a summery one, so this blog kind of makes sense. (Richard Keith is going to edit this and quite possibly murder me.)

So, today I made Gazpacho. Gazpacho is one of my absolute favorite summer foods! It's healthy, delicious and super refreshing! And the longer you keep it in the fridge, the better it gets! So make a big batch and eat it for days!!! (If it can last that long.... I seriously ate it for dinner last night and breakfast AND lunch today.) 


This gazpacho is all that I ever want to eat again. 


Ingredients:
1 hothouse cucumber, seeded and chopped (not peeled)
2 red bell peppers, cored and seeded and finely chopped (you can also use yellow or orange peppers for some more color)
6 plum tomatoes, chopped (if not plum, make sure to seed)
1 red onion, finely chopped
4 garlic cloves, minced
5 cups of tomato juice (more or less depending on how soupy you prefer your gazpacho!)
1/4 cup white wine vinegar

1 tsp tabasco sauce (do NOT omit this one, I promise it does NOT make it spicy; though if you like spice, add more!)
1/4 cup good olive oil
1/2 tablespoon kosher salt
1 teaspoons freshly ground black pepper


For garnish:
chopped basil 
chopped parsley
(optional.... but fresh herbs make everything 300% better!)


Method:
Sharpen your knives and get choppin! I like to chop everything really small (or make Rich chop everything really small while I sit at the kitchen table eating a popsicle. I am soooo good at being bossy.)If your veggies aren't chopped small enough it ends up looking more like salsa than soup and it's a pain to eat. So, listen to me like Rich does, I know what's up.

After your veggies are chopped, combine them in a large bowl and add the garlic, tomato juice, vinegar, olive oil, salt, tabasco, and pepper. Mix well and chill before serving. The longer gazpacho sits, the more the flavors develop and the more insanely delicious it becomes! 


Before serving, I add some chopped basil or parsley to brighten up the flavors even more! 


Tuesday, July 30, 2013

Summer Grilled Salad & Join a CSA!

Summer how I love thee. Let me count the ways:

Barbecues (Rich concurs)
Bikinis (Rich loves the even more than me)
Sun dresses (Rich may know what these are)
Self tanner (please note: not sun bathing. I am a ging after all.)

And of course peaches, plums, berries, watermelon, corn, 'maters (southern husband, I can say this) summer squash...... actually..... ALL SUMMER PRODUCE!!!

garden harvest!


Oh, summer produce. We are so lucky to live in California where our summer is year round and our produce is extra wonderful and easily accessible. However, if you love summer produce, but hate getting up early on Sunday morning, grabbing your hand woven reusable hemp bags, and braving the unkempt masses who keep trying to hand you a flyer so you'll "come check out their band, do what Richard and I just did... We joined a CSA!  And it has been seriously awesome. What is a CSA you ask? It is community supported agriculture. Every Thursday morning we wake up to a box filled with organic and seasonal fruits and vegetables right on our doorstep. Even better, the farmers know they can count on you to make a purchase, so you're helping lower the cost of seasonal organic produce, all without having to go see anyone's "band." The company that we go through is called Farm Fresh To You. Unlike a lot of CSA's there's no long term commitment, so can cancel at any time, let them know what you like, and if you are the tenth caller, we'll throw in a snazzy watermelon phone (Rich says that joke is funny to people who are old enough to remember the Sports Illustrated football phone. I am not one of those people). Seriously though, if you go to their website and enter the code 6164 you'll get $10.00 off when you check out! That's it. Infomercial over. (I'm obsessed.)

Between our CSA and our garden we have been super spoiled this summer. And with all of this bountiful produce we've had to get creative with what we eat so that it doesn't all go bad! This grilled salad is perfect for that! You can pretty much take whatever veggies you have in your fridge and add them to my super simple (sibilant) salad recipe!


Summer Grilled Salad

Ingredients:
1 red bell pepper
1 yellow bell pepper
 2 ears of corn
1 onion, sliced
1 zucchini
1 yellow summer squash
A few leaves of kale
2 tbsp olive oil
1/2 cup of cooked quinoa
Goat cheese (optional)
Chopped basil
Salt and pepper

4 tbsp extra virgin olive oil
Juice and zest from 2 lemons
3 small garlic cloves, minced
1 tsp dijon mustard
1 small shallot, minced
Salt and Pepper


Method:
Preheat your grill to medium high heat and prep your veggies! Slice the onion and squash. I kept the squash in large pieces for easier grilling. I left the peppers, corn, and kale whole. Toss everything with a little bit of olive oil and a dash of salt and pepper.


Grill your veggies until everything is slightly charred. The kale grills super fast, the corn will take 10 minutes or so. Once everything is grilled, set vegetables aside until cool enough to handle. This is a good time to make your dressing.


To make the dressing, combine lemon juice, zest, shallots, garlic, and mustard. Slowly whisk in the olive oil and season with salt and pepper.

Once the veggies are cooled, chop the squash, bell peppers, and kale. Remove the corn kernels and toss all of the veggies together with the cooked quinoa and the dressing. To serve, top with chopped basil and goat cheese if you like.


Sunday, July 28, 2013

Fresh Pasta Sauce & First Kisses

So in case you've been wondering, I had my first kiss in Kindergarden. It was with a boy named Sage (awesome foreshadowing for a young chef; I bet if I was into ladies, her name would have been Rosemary). I was 5 at the time and was attending kindergarten at Sacred Hearts Catholic School in Toronto, Canada. I haven't talked to Sage since, maybe because my family moved to another country, maybe because he was intimidated by my charming ways, maybe because we were five and he went on to marry a lovely woman named Lavender... I guess we will never know.

I'm not sure when Richard had his first kiss.... if I had to guess, he was probably 4 because he always has to beat me and he's always been a bit slutty. Either way, I know for sure it was not with his friend Caitlin, who he went to elementary school with at St. Patrick's Catholic School in Charlotte, North Carolina. How do I know this you ask? Because tonight she and her husband came over for dinner and I asked her. It wasn't awkward at all.

I know. My mind is blown, too... the ONE GILR EVER that Rich hasn't kissed!!!

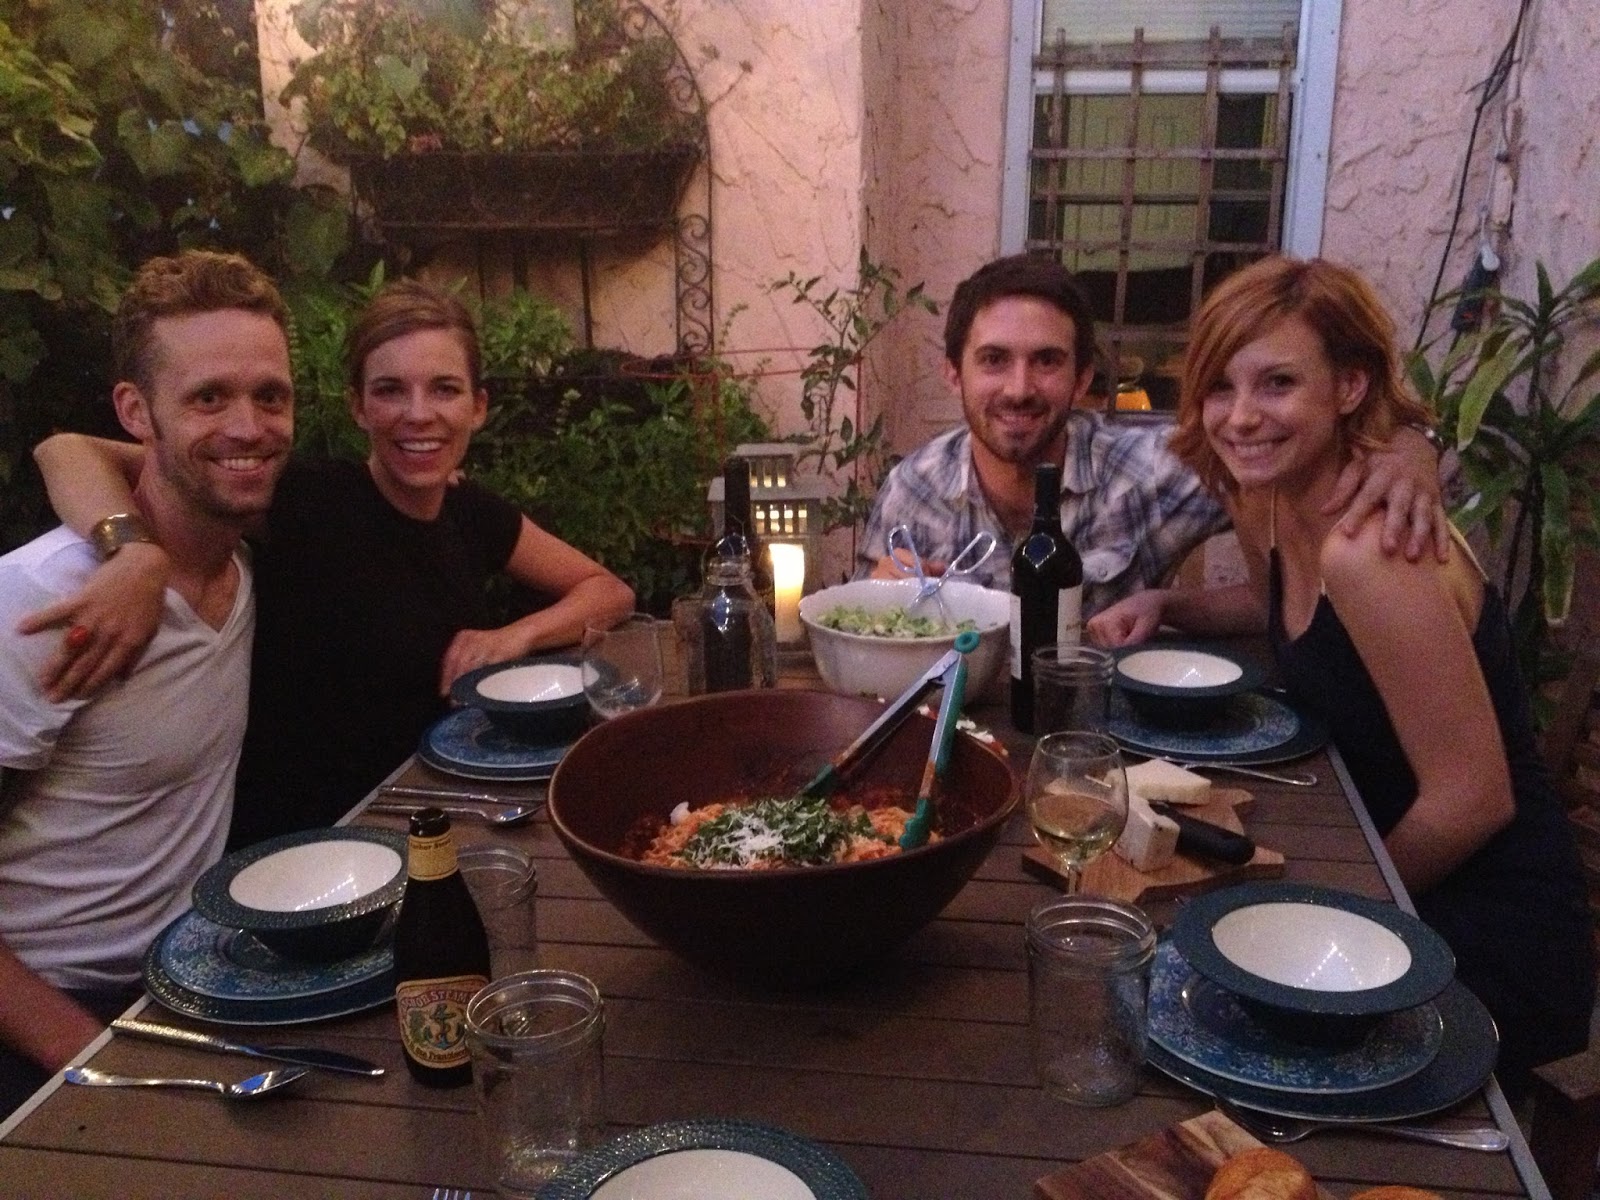
In case you are wondering, Richard and Caitlin hadn't seen each other since elementary school, so when we found out she and her husband, Tommy, were moving to Los Angeles it was quite an exciting surprise. And you know what happens when this ginger gets excited... DINNER PARTY!

Reunited and it feels so good!

With it being peak tomato season and our garden producing quite an abundance of San Marzano tomatoes, a pasta night was absolutely necessary... and when we throw around the term PASTA NIGHT  in this house, we are not effing around. I'm wearing the engagement ring of Rich's dead Italian grandma so I have a pretty high bar to live up to, lest I find my self resting eternally next to her. So when we say "pasta" we're talking homemade pasta and homemade marinara.... with all the ingredients from our garden!


Fresh Marinara Sauce

Ingredients:
2 tbsp olive oil
3 pounds of ripe San Marzano tomatoes, blanched and peeled (Roma will work great, too)
1/2 an onion, grated
1 stalk celery, minced
1 carrot, grated
3 cloves of garlic, minced
A splash of red wine
Lots of fresh basil
Lots of freshly grated parmesan cheese
Salt and pepper
& lots of  FRESH PASTA (recipe here)


Method:
Begin by blanching the tomatoes. Bring a small pot of water to a boil. Score the bottom of each tomato with a small "X" and then drop them into the boiling water for about 30 seconds and then put them into an ice bath to stop the cooking and let them cool. You will then be able to peel the skin off of them very easily. Do this with all of the tomatoes and then set them aside.


In a large pot, heat the olive oil and sauté the grated onion, carrot, and celery. Sauté until starting to caramelize. Add the minced garlic and cook just a minute until fragrant. Add a splash of red wine. I do this because I think it tastes delicious.... and lord knows I am rarely in the kitchen without a glass of it already in hand. Once the wine is reduced, add the tomatoes and bring everything to a simmer. Turn the heat to LOW and let cook for at least an hour.


The longer you cook tomato sauce, the more caramelized and delicious it gets! Your tomatoes should pretty much break down from cooking, but if they are a little chunkier than you like, you can use an immersion blender to get your sauce smooth right before serving it. Season with salt and pepper, top with tons of fresh basil and parmesan cheese and serve!

One bowl, four hours of love, several hundred noodles of perfection


 Madness:

The dinner was amazing and tipsy. We even kept warm by a fire in our very own fire pit. Needless to say, we are so thrilled to have Caitlin and Tommy living in Los Angeles there will be many more amazing dinners to come! Cheers!!


Tommy: "Where's Caitlin!?"


Three Dog Night

Wednesday, July 24, 2013

Fresh Mint Chip Frozen Yogurt

I always joke that I eat ice cream for breakfast, but I never actually have.... until today. I dunno. I woke up to a hot apartment and it just really seemed like acceptable behavior. Plus, Rich's back is still hurting and he's being a total baby about it, so I figured if he can act like a child, I can eat breakfast like one. So after I made Rich some eggs....... and I had a bowl of ice cream like a fat kid pretty girl. 

Here's the thing.... you know how sometimes, oh, I dunno..... they put an egg on a bacon cheeseburger so your husband is like "this is an acceptable breakfast sandwich.... theres AN EGG on it!" That is how I felt about this ice cream.... IT HAS GREEK YOGURT IN IT! This means three things:

1. Anything with REAL yogurt in it is automatically healthy*
2. Anything that is healthy is a great breakfast food. 
3. Frozen yogurt is an acceptable breakfast food. 

I know, I know- best use of PROOFS ever. Remember high school geometry? Who says that shit doesn't come in handy one day. (Hannah, stay in school. Being pretty isn't a career. Wait... Marco says it is.) So, in order to make this proof true, I'm blogging a recipe about it. Because even if you don't believe in math and science, everyone knows that if you blog something, it has to be true. (Seriously, stay in school, Hannah.)

*While this statement may be fact to me... it is not actually fact and should not be taken seriously. 


fresh mint chip frozen yogurt photographed in porcelain ice cream cones
 from anthroplogie. are they serious with these? best invention ever. best purchase ever.


Ingredients:
I cup fresh mint leaves, chopped
1 cup heavy cream
1/2 agave nectar 
3/4 teaspoon organic peppermint extract
2 cups greek yogurt (I used 2%, not whole milk and it turned out great)
2 ounces mini chocolate chips

Method:
Combine the chopped mint leaves and the cream in a saucepan and bring to a simmer over medium heat. Once the cream is simmering, add the agave nectar and remove from heat and let steep for 30 minutes. 

Once cooled, pour the cream through a sieve to remove the mint leaves and then combine with the greek yogurt and peppermint extract. Refrigerate the mixture for at least 30 minutes, or until chilled, and then churn in an ice cream maker according to manufacturer's instructions. When the yogurt is just about finished churned, add the chocolate chips. 

Store in an airtight container for up to a week. Makes 4-6 servings.


Inspiration from Sprouted Kitchen by Sara Forte.