Showing posts with label Le Cordon Bleu. Show all posts

Wednesday, October 10, 2012

Friday Night Feasts: Date Night Osso Buco & Barolo

I blogged about Osso Buco way back when in culinary school, but now shit's about to get real. I'm not some bright eyed (ha...) culinary student waking up at 4:45am anymore (quiver.)
I am someone's wife...and tonight it's date night....well, Friday was date night, but you get it. 

Richard and I have received some pretty awesome advice over our time together... two of our favorites being "always have date night," and "once a week, tell each other everything that is bugging you about the other person." So, we have started combining the two. A romantic dinner for two followed by one (or two) bottles of wine and some hefty conversation. Sounds miserable, but after some wine I tend to get chatty and lovey, so it really ends up working out in everyone's favor. Once I'm a little tipsy you can tell me I'm a huge crazy bitch and I'll probably just start making out with you. (Don't get any ideas.... I'm a married woman now---butterflies.)

So, on this weeks menu we had Osso Buco served with saffron risotto and an amazing Barolo. I'm pretty sure I have said before that my favorite things to cook are those that take patience and hours braising in wine. There's nothing like the smell that wafts through the house on a braised short ribs or coq au vin kinda night. Mmm. Osso Buco is just that. Veal shanks braised in stock and wine.... an Italian delicacy. Served with saffron risotto this dish is to die for. And you MUST drink a nice heavy Italian red.... my fave being a good Barolo.


We got some pretty wonderful cookbooks as wedding gifts, so in my attempt to romantically cook my way through them- this recipe can also be found in Williams Sonoma Bride & Groom Cookbook. (Thank you Erin and Joe!)


Osso Buco with Saffron Risotto 

Ingredients
3/4 cup four
Kosher Salt
1/2 tsp ground pepper
2 center cut veal shanks
5 Tbsp olive oil
1 small onion, finely diced
1 large carrot, peeled and finely diced
2 ribs celery, finely diced
4 cloves garlic, minced
2 bay leaves
3/4 cup dry white wine
1 cup beef stock (more as needed)
1 can (28oz) Roma tomatoes, drained and chopped
2 tsp orange zest, chopped
2 springs fresh thyme
1 small sprig fresh rosemary
Parsley, chopped for garnish

Saffron risotto (recipe here)


Method:
Preheat the oven to 350 degrees. 
Combine the flour with salt and pepper and spread on a plate. Dredge the veal shanks in the flour mixture and coat evenly. Shake off excess flour. 


In a heavy, oven proof pan with a tight fitting lid (large enough for both shanks in a single layer) heat olive oil over high heat. Place the veal in the pan and brown evenly, about 4-5 minutes on each side. Set veal aside. 
In the same pan, brown onions, celery, carrots, garlic, and bay leaves with a pinch of salt. Cook until golden brown, but be careful not to burn. Cook about 8-10 minutes. 


Add the wine and deglaze the pan, stirring to loosen up any caramelized bits from the bottom of the pan. Add the stock and reduce by half. Add the tomatoes, orange zest, and herbs and cook for about 5 minutes. 


Return the veal shanks to the pan. The tomato mixture should cover the shanks about 2/3 of the way... if not the add a little more stock. Cover the pan with a tight fitting lid and braise in the oven for 2 hours, turning the shanks every 30 minutes to ensure even braising. If the liquid gets too low while cooking, add more stock. 
When the shanks are done, they will be extremely tender. Remove the shanks and set aside. Discard the bay leaves and reduce the sauce until it is a nice velvety consistency. Adjust the seasoning with salt and pepper. 

To serve, spoon sauce over the shank and place on top of risotto. Garnish with chopped parsley and a big glass of wine. 

this one is WONDERFUL!


P.S. Osso Buco literally means "bone with a hole" referring to the extremely flavorful marrow lodged in the middle of each shank bone. I save this part for Marco. 


Wednesday, July 27, 2011

White Bean Bruschetta with Prosciutto

Bruschetta is one of my absolute favorite foods. 
I want to eat it three times a day, bathe in it, and wake up next to it in the morning. 
I throw Italian themed dinner parties so that I have an excuse to make mountains of it. I make it for taco night to remind people how good I am at making it and I throw it at my boyfriend every time he stops smelling like garlic in between.
Obsessed. 


I need to live in Italy.


Ingredients:
6 slices of rustic italian bread
4 roma tomatoes, small dice
1 small clove of garlic, plus 2 whole cloves to rub on toasted bread
5 leaves of fresh basil, cut into thin strips
1 tbsp olive oil, plus some for rubbing on bread
1/2 tsp salt
Thinly sliced prosciutto

White Bean Paste
1 cup of great northern white beans, cooked and drained
1/8 cup white onion, chopped
1 small clove garlic
2 tbsp olive oil
1 tsp salt, more or less to taste and depending on if you use canned beans of dried. 

Basil oil
handful of fresh basil leaves
1/4 cup olive oil
salt, to taste
cheesecloth/ fine mesh strainer

Method:
In a bowl, combine diced tomatoes (remove the seeds), basil, olive oil, and salt. 
Finely chop the garlic and use the side of your knife to grind it into a smooth paste. Add the garlic paste to the tomato mixture and gently stir. Set aside to let the flavors marinate. 

For the bean paste I used dried beans. Please learn from my mistake and do something better with your time than wait for 45 minutes for  your beans to cook..... use canned beans and drain them well. If you are crazy and want to use dried beans, soak them overnight and then simmer them in a large pot of water for 45 minutes to an hour until they are soft. 
Combine beans, chopped onion, small clove of garlic, olive oil, and salt in a food processor and blend until almost smooth. I like my food to have a rustic feel to it, so I left my beans a little bit chunky. 

Brush both sides of sliced bread with olive oil. Rub the bread with garlic. I smash my garlic cloves and then rub them on the bread for more flavor. Place bread on a baking sheet and toast in a 400 degree oven for 5 minutes or until the bread is golden brown and crispy. Keep an eye on the bread- I have to really emphasize these things because I am pretty much a professional at burning things instead of toasting them. 

To Assemble:
Spread the bean paste on each piece of toasted bread. 
Place a heaping spoonful of tomatoes and basil on top of the bean paste and then top it all off with a pile of prosciutto. 
If you want to garnish the dish with basil oil, pour olive oil and basil into a blender. 
Can someone please buy me a Vita-Mix Blender? Thanks.
Blend until smooth and then strain the mixture through a cheesecloth and add salt to taste. 


Thursday, July 14, 2011

Pad Thai

Today was Asian noodle day at school so I made sure to team up with the Japanese girl. My.... our.... noodles were, well, perfect (duh.) I think it's due to our collective Asian heritage.


Pad Thai.


Ingredients:
Thai rice stick noodles (Bonh Pho)
1/4 cup peanut oil
2 eggs, beaten
1/2 cup tamarind paste, diluted in water
1/4 cup thai fish sauce
1 chicken breast cut into small strips
Tofu..... I think tofu is gross and would personally leave it out, but go ahead.....
3 cloves garlic, minced
1 thai chili pepper, minced (serrano will work fine if you cannot find thai)
1/2 cup bean sprouts
2 Tbsp palm sugar
Juice of 1-2 limes
Cilantro, chopped
Thai basil, chopped
1/4 cup toasted peanuts

**LA has plenty of great Asian markets. I suggest you find one. If you start substituting palm sugar for brown sugar and fish sauce for soy sauce, you will end up with a feeling of defeat.... not pad thai. 


Plus, you can stock up on hello kitty chopsticks and other things that every kitchen NEEDS..... 

Method:
Soak rice stick noodles in warm water until soft according to package directions.

Have everything chopped, prepped, and ready to go before you start cooking. This dish cooks very quickly.


Heat peanut oil in a medium skillet until it is VERY hot. Sauté tofu until golden brown and set aside.
Make sure that there is nothing left over in the pan from the tofu. Add a little peanut oil and again, get the pan VERY hot. Pour in beaten egg, remove the pan from the heat, and swirl the egg around the pan to get a thin omelet. Once cooked through, turn the pan upside down to get the egg out. Set aside.
Add oil and heat pan again, yes, again...... then sauté chicken. When the chicken is about 90% cooked, add the garlic and cook until fragrant- about 20 seconds. Turn heat down to medium/low. Add tamarind paste. Cook for about 1 minute and then add the fish sauce. Cook for 1 minute and add lime juice and chili pepper. Add bean sprouts and palm sugar. Add the softened noodles and toss with the sauce to coat.

To plate:
Chop cooked egg and toasted peanuts.
Place pad thai noodles on a warm plate and garnish with cooked tofu, chopped egg, toasted peanuts, chopped cilantro, chopped basil, green onion, and lime wedges.

Delete the Thai food number from your phone and enjoy. Or if this didn't go so well, call the number, place order, and also enjoy.

A confession:
As happy as I am to be able to make my own pad thai.... the likeliness of me running to the Asian market and spending an hour shopping and prepping ingredients when I am hungover and in need of Thai food for mere survival...... absolutely not. In this instance, note the final instruction above.


More noodles.....


and more noodles......


and dumplings.....


the end.


Wednesday, June 29, 2011

Lemon Curd Pie with Italian Meringue

I have pneumonia. 
And a sinus infection. 
And bronchitis..... 
I know, right? Who gets this sick that isn't 105 years old? 

So, while lying on my death couch is kind of awesome because I am catching up on some seriously awful T.V. and some much needed blogging, my brain is not really working and the thought of coming up with clever little stories to start each post out with kind of makes me want to cry. 

That was the longest run on sentence EVER.... I blame the infection in my lungs. See what I did there? 

Please excuse my lack of creativity and just focus on how perfect my recipes are and the fact that my pictures are stunning. Thanks. 

While you are focusing on all of my sensational blogging qualities, can someone please call my boyfriend and remind him that deep down under all of the tissues and prescription bottles is actually a pretty girl who normally showers and dresses nice and sometimes even puts on a little mascara. Someone please just remind him that I will be back to pretty soon. Thanks.... again. 

lemon curd pie topped with italian meringue.

Ingredients:
For the Crust
1/2 pound butter
3 oz sugar
1/8 tsp salt
2.25 oz eggs
12 oz pastry flour (all purpose is also fine)

For the Lemon Curd
3 eggs
3 egg yolks
7 oz sugar
zest of 2 lemons
5.5 oz lemon juice
2 oz unsalted butter

For the Italian Meringue
4 oz egg whites
8 oz sugar
2 oz light corn syrup
Water as needed

Method:
Begin by making the pie dough. Combine the butter and sugar in a kitchen-aid mixer or with a hand mixer until smooth and no clumps of butter. Add the eggs and salt. Mix in the flour. Mix everything until smooth, but do not over mix. Wrap dough in plastic wrap and refrigerate until consistency is workable. I was in a hurry and threw mine in the freezer for an hour and it was perfect. Once the dough has rested, place it between two pieces of plastic wrap or parchment paper and roll it out to about 1/2 inch thick and large enough to fit in the pie baking dish. Mold the dough int the baking dish. Using your thumb and index finger, crimp the edges of the pie dough and trim off any extra dough. This takes practice.... visit Sur La Table if you are lazy- they have a dough cutting tool that does the same thing. FIll the pie crust with pie weights and bake in a 350 oven until golden brown. About 10 minutes. Set aside.

To make the lemon curd, combine the eggs, yolks, sugar and zest. Whisk together and add the lemon juice. Put the mixture in a double boiler (or in a bowl over a put of boiling water) and stir continuously with a spatula until the mixture thickens. This will take 8 minutes or so and the mixture should be able to lay on top of itself. Strain the mixture over butter, let the butter melt, mix gently, and pour into the pre baked pie shell. Let cool completely before topping with meringue. 

While the pie is cooling, prepare the meringue. Dissolve corn syrup, sugar, and a tiny bit of water in a pan. Bring the mixture to 220 degrees (measure with a candy thermometer.) When the sugar reaches 220, begin whisking the egg whites in a kitchen-aid mixer or with a hand mixer. The eggs should begin to start frothing and forming soft peaks. When the sugar mixture reaches 240 degrees and resembles a thick syrup, remove it from the heat and slowly whisk it into the egg whites. Continue whisking for 8-10 minutes until the egg whites form stiff, shiny peaks and the meringue has cooled. 

Spoon the meringue into a piping bag (I use ziplock bags so that I can dispose of them afterwards) and using a large star tip, pipe the meringue on to the top of the lemon curd pie. If you do not have all of the equipment, you can just spoon the meringue on top of the pie, but it will not look as pretty as mine. Using a blow torch, brown the top of the meringue. You can also do this in the oven under the broiler, but I find it makes the meringue turn grey rather than golden.

*note: the lemon curd can be jarred and given as gifts, served with other desserts, on top of ice cream.... seriously whatever. It is amazing by itself. 

I included links to all of the tools that I used to make this..... obviously they are not all necessary or as expensive as my suggestions, but if you want a kitchen as fabulous as mine, it is time to make an investment. (Cheaper versions of the same thing can probably be found, but I made sure to point out all of the ones that I want... and those are pricey.)


Monday, June 27, 2011

Creme Brulee

I have not posted in weeks (which may feel like years because you have missed me so much)
I was going through a very very traumatic time.... actually two traumatic times.

I lost my sense of taste.
After being sick for almost a month my body decided to torture me and not let me taste a GD thing for 6 days. 6 days is almost a week and that is like an eternity, let me tell you. A chef losing their sense of taste is like Richard Keith becoming a mute..... or like a singer having their vocal chords ripped out. It was a really hard time for me. I would look at the chocolate souffle that I had flawlessly created and taste it with my mind....... it was like a death sentence. A culinary tragedy of the worst kind. I missed out on pulled pork, birthday cake, BBQ, and everything else wonderful.

Then after finally making amends with my body and being able to taste..... I chopped my finger off. Ok... not my finger, but I chopped off half of my nail, which is the very best part of a girl's finger-- especially right before having a week off from school when I am actually aloud to have a manicure. Ugh. I am sorry to all of the people that I have previously made fun of for bleeding at school.... owwwwie. I should not have made fun of you (behind your back) for hurting yourself because it really hurts and I have a very bandaged up finger to prove it.

So, while all of this drama was going on I managed to make it through the last week of my baking class and ace my finals (duh)
Even better than getting A's on all of my finals was biting into a creme brulee and actually tasting it.
I really love creme brulee.


(really delicious) creme brulee.

Ingredients:
1 quart of heavy cream
1 vanilla bean, split and scraped
1/2 cup of sugar, split
6 large egg yolks

Method:
Split the vanilla bean in half lengthwise and scrape out all of the pulp. Combine the pulp and the whole bean with the heavy cream in a sauce pot and bring to a boil over medium heat. Take off of heat and let the cream and vanilla bean steep (infuse) for about 10 minutes. 

In a medium bowl, whisk together the sugar and egg yolks until the color begins to lighten a little bit. This makes my arm hurt. Temper in the cream very slowly..... like a few drops at a time. Whisk mixture together and strain. 

Pour the mixture into ramekins. Place the ramekins into a shallow baking dish or cake pan and fill the dish with enough water to come half way up the ramekins. Cover the dish with foil and place in a 325 degree oven for about 25 minutes until the custard has set, but is still loose in the center.... kind of like jello. Cool and refrigerate for at least 2 hours, but preferably overnight. 

Once cooled, dust the top of each creme brulee with sugar. Using a torch, scorch the sugar until evenly brown on top and very crispy. Let sit for a few minutes before serving so that the sugar hardens.

If you do not have a torch, you can put the creme brulees under the broiler in an oven, but this heats up the custard and does not work as well. 


Wednesday, June 1, 2011

Cream Puffs

The only thing that is keeping me from eating a dozen cream puffs right now is knowing that I have to shoot a commercial in less than a week. Working in an industry that would rather you be skinny gets tricky in baking class. THANK GOD that I get to wear a pregnant belly while I shoot, leaving me able to eat one cream puff. Maybe two. Ugh. 

for your inner fat kid.


Pâte à Chou
1 1/4 cups of water
3/4 cup unsalted butter
1/2 tsp salt
1 1/2 cups all purpose flour
4-6 large eggs

Method:
Bring water, salt, and butter to a boil over high heat. 
Reduce heat to medium and add flour all at once and mix together to form a dough. Continue mixing for about 3 minutes to cook out the taste of flour. 
Remove dough from heat and beat in eggs one at a time until the mixture is glossy and very sticky. 
Spoon mixture into a piping bag and pipe 2 inch 'puffs' onto a parchment paper lined baking sheet. Be sure to give plenty of space as they will rise. 
Bake at 375 degrees for about 20 minutes until golden brown and dry. Let cool completely. 

Chantilly Cream Filling
12 oz whipping cream
Powdered Sugar and pure vanilla extract to taste

Method:
Whisk whipping cream in a large mixing bowl until soft peaks begin to form. Sift in powdered sugar and add vanilla to lightly sweeten. Spoon shipping cream into a piping bag. If you do not have a piping bag or are super lazy like me.... use a ziplock back and snip the tip off of one of the corners. This works the exact same way and then you can just toss it out after. 

Once the pastry shells have cooled, cut the top third of the puff of. This will create a little bowl which you will fill with the Chantilly cream. Replace the lid to the pastry and sprinkle with powdered sugar. 

The cream puffs have a neutral flavor that can be filled with anything......sweet or savory. 

The same dough is also used to make eclairs


Friday, May 20, 2011

Bread. A LOT of bread.

The last 3 days in class I have made bread. A LOT of bread.
My kitchen counter looks like a bakery.

French baguettes. 


Rye.


Brioche.


Sourdough


I am thinking of writing off my tuition as "therapy sessions." I have never been so happy... or SO skinny.... fat. Skinny fat. Ugh.

Wednesday, May 18, 2011

Chocolate Chip Cookies.

Can I please note that as I type this my boyfriend is at spin class and I am sitting in front of my computer eating cookies.

I am going to be in big trouble when I turn 25 and get a harsh dose of metabolic reality.

Yes, my birthday is in 2 weeks and I LOVE presents. Thank you.

These have negative calories. I promise. 


Ingredients:
5 oz butter
4 oz granulated sugar
4 oz brown sugar
1/4 oz salt
3 oz eggs (technically you should measure eggs because they are all different sizes. I used 2 eggs.)
1/4 oz vanilla extract
10 oz pastry flour (You can use all purpose flour. Pastry flour is just fluffier.)
1/4 oz baking soda
10 oz semi sweet chocolate chips

Method:
Cream butter and sugar. Whisk together eggs and vanilla and combine with butter and sugar mixture. Sift the dry ingredients and slowly fold into the wet ingredients. Add chocolate chips, roll into 1 oz balls and place on a cookie sheet lined with parchment paper. Bake at 350 degrees for 8 minutes or until golden brown. 


Tip: Well, two tips, actually. 
1. DO NOT OVERMIX your cookie dough. Over mixing is what causes cookies to be flat and chewy. 
2. Chilled cookie dough is best. Once your cookies are on a cookie sheet and ready to go into the oven it is best to put them in the freezer or fridge for a few minutes. 


Perfect Peanut Butter Cookies

Today my baking teacher threw around the word "PERFECTION."
I baked perfect, melt in your mouth, chewy, yet crumbly peanut butter cookies.
I mean..... to die for peanut butter cookies.

"I just made your day didn't I? You are just like me."
My baking teacher then seriously called me out on my proud case of OCD.
I love her.

Note: My other baking instructor is a man with an accent so thick he sounds like you should be watching him make baguettes on a street corner in France.

This class may be my version of heaven.

I love this class. 


Perfect Peanut Butter Cookies

Ingredients:
6 oz butter
4 oz brown sugar
4 oz granulated sugar
1/2 teaspoon salt
6 oz peanut butter
2 oz of eggs (1 egg)
1 teaspoon vanilla 
8 oz pastry flour
1/2 teaspoon baking soda

Method:
I never use my kitchen aid mixer at home because I think it is a huge pain in the ass to clean and I kind of enjoy doing everything by hand. I literally bought the stupid thing to put on the counter, look pretty, and remind everyone that I can probably bake way better cookies than them. 
However, we did use mixers in class today, so if you have one you can use it.... I guess. 

Cream together butter, peanut butter, sugar, brown sugar, and salt. 
Combine eggs and vanilla. Fold into butter mixture. Make sure that you do not over mix or your cookies will end up super flat. 
Sift together dry ingredients and slowly add them to the butter mixture until evenly combined and smooth. 

Form 1 oz balls of dough and place evenly on a parchment paper lined cookie sheet. I SWEAR by parchment paper. It doesn't make your cookies greasy on the bottom and it keeps them from sticking. Foil works well also.

Using a fork, create a cross pattern on top of each cookie. I dipped my fork in sugar before doing this to give them a little glisten. 

Bake at 375 degrees for about 10 minutes or until golden around the edges. 


Tuesday, May 10, 2011

Thrilling.

First day of finals....

Four classes into culinary school and I am still taking tests on knife cuts.... I guess because they are SUPER relevant in the culinary industry now a days.


That is what an "A" looks like my friends.

Tuesday, May 3, 2011

Nice rack.

I don't like lamb.... and not at all because Mary had a little one.
Trust me, I have lost anything resembling a bleeding heart for animals that taste delicious.

I just think lamb is kind of gross.

Buttttt......

Mustard crusted rack of lamb

Ingredients:
Rack of lamb
Dijon mustard
Panko bread crumbs
Chopped parsley
Garlic
Salt and pepper

Method:
Prep lamb by exposing rib bones. Sprinkle with salt and pepper on the fat side and then sear all sides in a hot pan to get a nice color. Set aside and let cool. 
Combine bread crumbs, finely chopped parsley, garlic, salt, pepper, and a little butter.
Brush fat side of lamb rack with dijon mustard. You do not need to over do it.... this is just to act as a glue to hold the bread crumb mixture to the meat. 
Pack bread crumbs onto the mustard side if the lamb and place in a 350 degree oven for about 15/20 minutes until medium rare.... 

Served with brussels sprouts and pommes anna.

Oh, how I LOVE brussels sprouts. I made them with candied walnuts this time, but sauteing them with bacon makes me weak in the knees. 

Thursday, April 28, 2011

Osso bucco with risotto milanese.

As anti kill and eat poor baby cows as I am, I am very pro meat being so tender that it falls of the bone and melts in your mouth......

Moral dilemma. What else is new?


osso bucco with risotto milanese.

Ingredients:
Veal shank
Onion
Celery
Carrots
Garlic
Tomato paste
Flour
Tomato- seeded and sliced
Orange zest
White wine
Veal stock
Thyme
Bay leaf
Olive oil
Butter
Salt and pepper

Method:
Heat oil in large dutch oven (Le Creuset, duh.) Sear both sides of the veal shank and set aside. In the same pot saute the onion, carrot, and celery until they begin to color. Add garlic and saute for 2  minutes. Dust ingredients with flour and cook another 2-3 minutes. Stir well. Add tomatoes and cook until the liquid evaporates. Add orange zest and then deglaze the pan with white wine. Reduce the wine, add herbs, and return the veal to the pot. Add enough stock to almost cover the meat. Cover and braise until soft (2-3 hours)

While the veal is braising you can make the risotto milanase. 

Ingredients:
Italian arborrio rice
Bone marrow (optional, but delicious)
Warm chicken stock
Onion- finely chopped
White wine
Saffron
Butter
Parmesan cheese
Salt and pepper

Method:
Heat oil in pan. Add bone marrow and cook over low heat until melted. You can use butter instead of bone marrow and somewhere a European with a better palate than you will cry. 
Sweat the onion until it is soft. Add the rice and cook until opaque. Add white wine and saffron. Turn the heat up to medium high and cook until all of the wine has been absorbed. Add some chicken stock and stir the rice consistently until the liquid is completely absorbed. Repeat this step a few more times until the rice is 'al dente'  and the consistency is creamy, but not sticky. Finish the risotto with butter and parmesan cheese before serving. 

Back to the Osso Bucco....

Remove the dutch oven from the heat. Set the veal shank aside and strain the sauce through a fine mesh strainer. If possible, push some of the veggies through for added flavor. Reduce the liquid in a medium saucepan until 'nappe' Finish with butter and season. 

Return the shank to the sauce and serve with risotto. 

I topped mine with chopped parsley, garlic, and lemon zest.


Sunday, April 24, 2011

Happy Easter.

Happy Easter everyone!

I hope finds you surrounded by friends and family...... and boyfriends meeting the family. (ah!)
Yes, Richard is meeting the fam today which was pretty good timing because I could stress bake without looking like a nut. I am not stressed. If anything I should be stressed about any judgment on what an outstanding catholic I have become.

Ah, baking pies.....

farmer's market strawberry rhubarb pie

Strawberry rhubarb is my absolute favorite pie which is great because I am absolutely amazing at baking it. I will post the recipe soon. Seriously.... soon.

Since I apparently not only gave up exercise for lent, but also blogging.... now that Easter is passing I will be more on top of my blog.... and maybe exercising. Probably not, though. 

While the pie is in the oven....

Easter morning baked eggs

Ingredients:
Eggs
Ricotta cheese
Mushrooms
Prosciutto
Shallots
Black truffled cheese
Fresh herbs

That's right. I am covering pies, Easter, and breakfast in one blog.... check me out. 


blackberry lemon pie with a graham cracker crust

Ingredients:
Graham cracker
Sugar
Cinnamon
Butter
Fresh Blackberries
Fresh lemon juice
Cream cheese
Sweetened condensed milk
Lemon zest

Method:
Combine crushed graham crackers, sugar, and butter to form crust. Bake about 10 minutes in a 350 degree oven. 
Combine cream cheese, condensed milk, lemon juice, and zest. Pour mixture in cooled crust. Top with blackberries and lemon zest. Refrigerate over night.

Thank you Tom Rice for this amazing recipe

And because I have to.....

braised bunny in a mustard cream sauce served with carrot ravioli

Yep, Easter week at Le Cordon Blue.....


Tuesday, April 12, 2011

Mussels with white wine and garlic sauce.

Today in class we prepared mussels in a white wine and garlic sauce served with angel hair pasta tossed in a light tomato sauce.

My pasta was actually tossed in a light tomato sauce and dish sanitizer.... I claim no responsibility for being retarded before 9am.

I will repeat..... I tossed my pasta in dish sanitizer. Dish sanitizer looks like water and apparently is safe for consumption.

Moules mariniers.

Ingredients:
Mussels- cleaned (duh.)
Garlic
White wine
Shallots
Parsley
Butter
Fresh lemon juice
Salt and pepper
Tomatoes

Angel hair pasta
Tomato sauce (obviously fresh.... recipe will be posted soon. Until then.... use google, please.)

Method:
Saute shallots in a little oil. Do not brown. Add garlic to pan. Add about a cup of white wine and bring to a simmer. Add mussels, cover and steam for about 5 minutes until mussels are cooked. They will open up when they are done. Remove mussels from pan and set aside. Reduce sauce to 'nappe' consistency. Finish with butter. Toss with diced tomatoes and a good handful of freshly chopped parsley. Add mussels back to pan, season, and serve hot. Serve with grilled garlic baguette (or just toast it in the oven) and pasta. 

Ok. So I tossed my pasta with dish sanitizer. I am not a complete idiot. My station partner left a bucket of sanitizer next to our stove because she was cleaning her utensils. My tomato sauce was a little too thick and I thought the sanitizer was water. 

I served my pasta anyways and nobody died. 

Karma. 


Tuesday, April 5, 2011

5am comes early.

Today was my first day back to school post spring break.
Wake up call!
The 5am kind as well as the "this class is going to be a hell of a lot tougher than the last one" kind.

this little piggy did not make it....

The dishes that we cook will now be spread over two days. A day for prep and a day for cooking.... kind of nice. We will also be expected to not only show up with recipes, but also production schedules and plating diagrams. We will be making full plates rather than single components..... as if I needed to start eating even more. 

(vegas, vegas, vegas. bikini, bikini, bikini....ughhhh)

For tomorrow: beef stew with glazed vegetables and bone in pork chops with braised cabbage and bulgar wheat pilaf. 

Monday, March 21, 2011

Day 25

Yes. I skipped day 24.

That nose stuffing, taste bud ruining sickness that I was plagued with last week finally caught up with me post St. Patty's day and I prescribed myself a day in bed to cheat death.

he did not cheat death.

Today was our last cooking day of the term before I move on to Culinary Foundations 3. Ah! I get to make my own sausage in that class. I don't really like sausage, but it looks like a project that is messy and I can totally be on board with. Foundations 3 also brings me one class closer to baking.... and if you know me and know anything about my random efforts in occasionally turning my kitchen into a bakery, you know I feel about this.

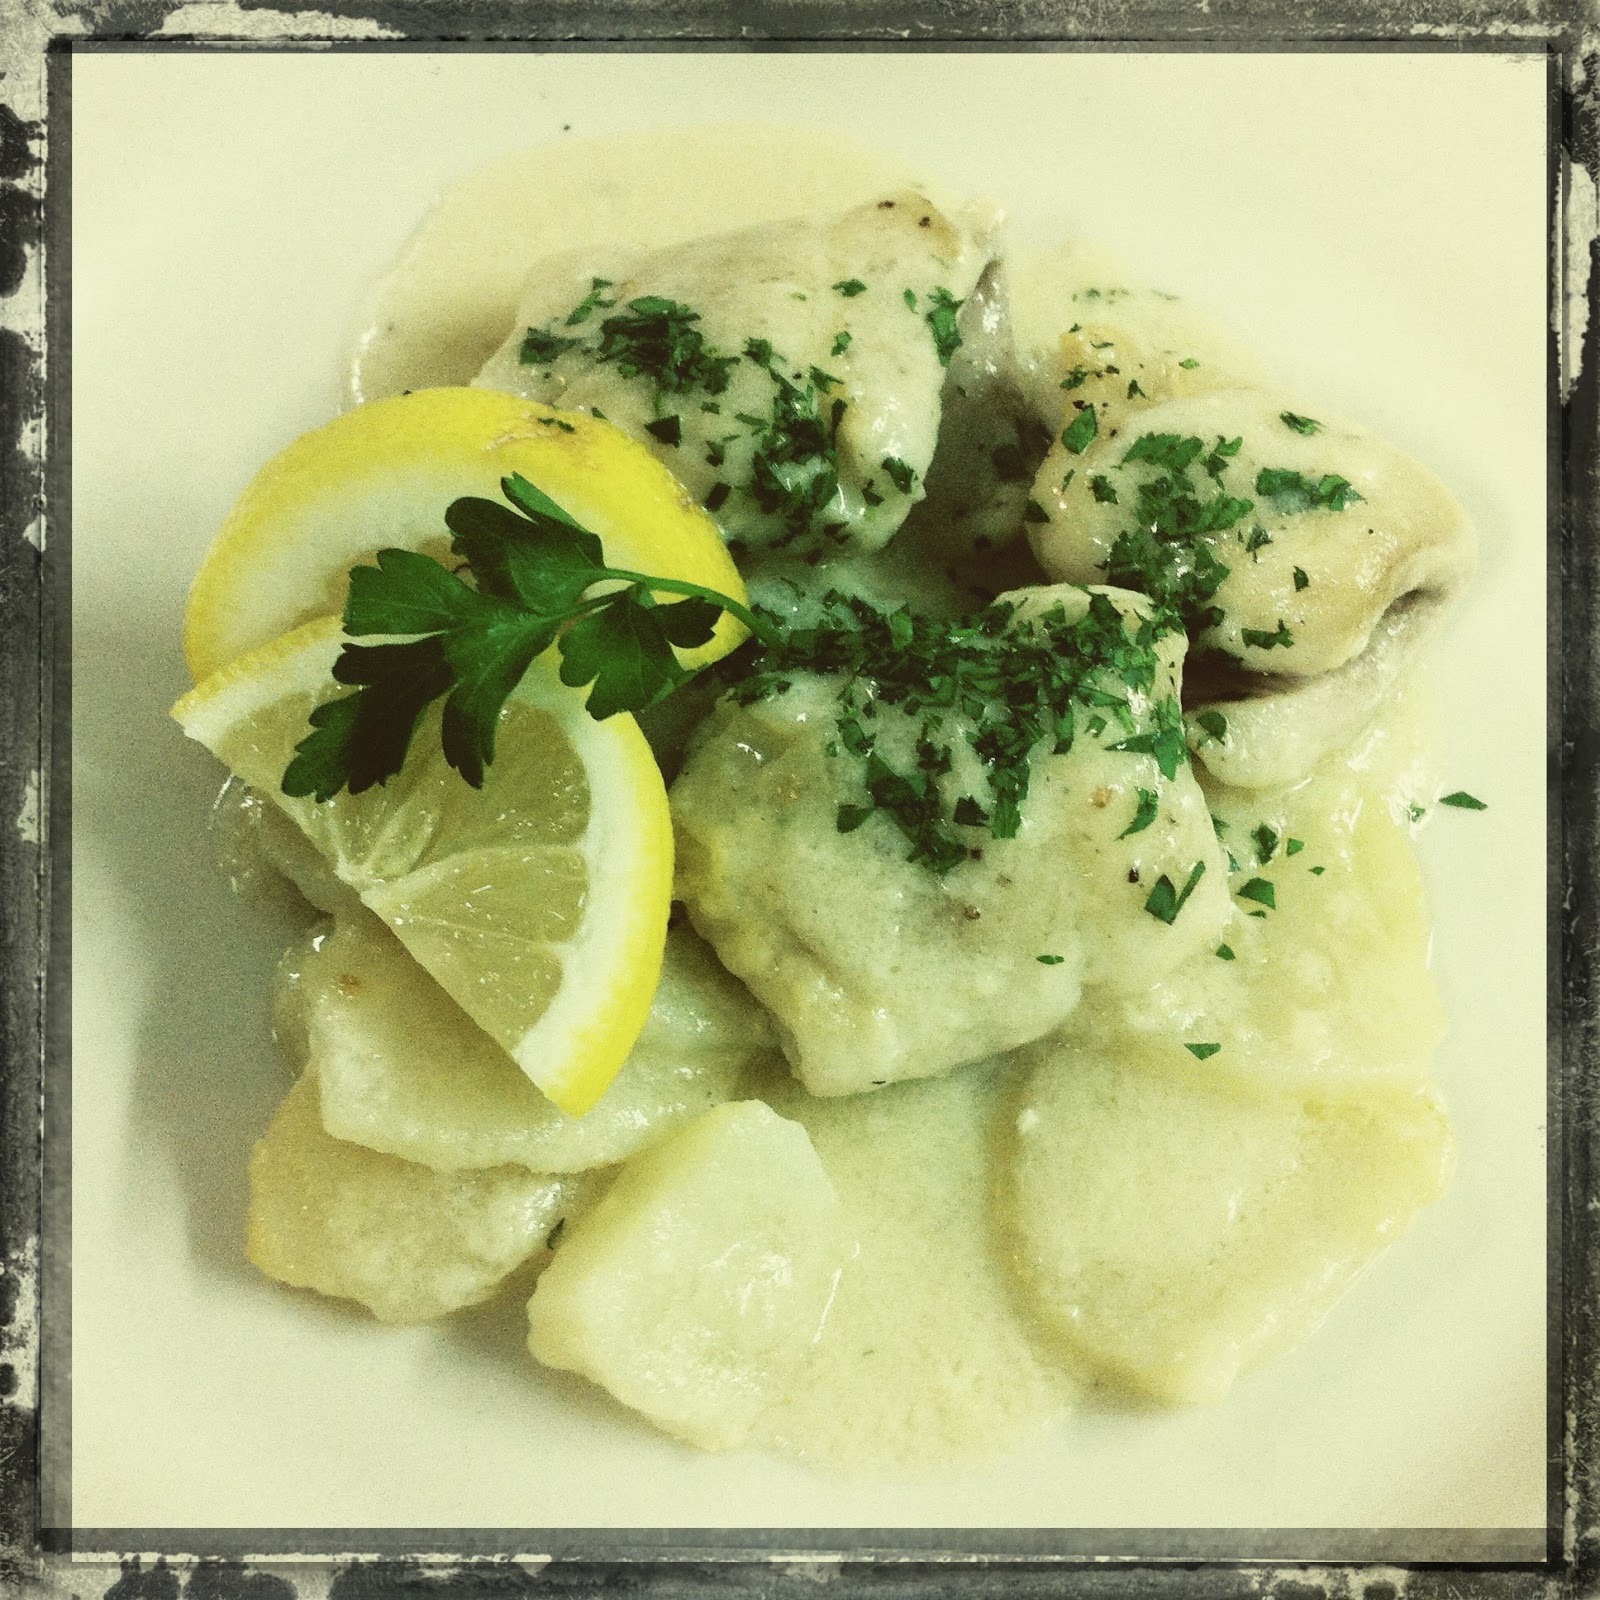
We made poached salmon served with a beurre blanc sauce and also prepared fillets de sole bonne femme which is a fancy French way of saying "kind of gross baked sole with fish gravy." Not a fan. Today was actually the first day that I have ever prepared salmon or really even ever touched it. Mine was a little over cooked, but for my first time I was pretty pleased that it didn't spontaneously combust.

poached salmon avec beurre blanc.

Ingredients:
Salmon fillet
Court bouillon (poaching liquid)

For the court bouillon you will need:
Water
Onion
Carrot
Celery
Bay leaf
Thyme
Parsley Stems
Acid- lemon juice, wine vinegar, white wine

Method:
Begin by making the court bouillon. Chop vegetables and combine everything in a large stock pot and fill it with water. Bring to a boil and then let the ingredients steep for about 15 minutes. 

In a smaller saute pan, bring enough water to almost cover the fillet of salmon to poaching temperature. Liquid temperature to poach must be between 160 degrees and 180 degrees. 

Season the salmon and place it presentation side down in the poaching liquid. The presentation side will always either be the side with the skin if there if skin on the fish, or the side that had bones if there is no skin on the fish. 

Cook the salmon to medium. It should be firm to the touch but with an orange center. 

this salmon is properly cooked to medium. my salmon did not look like this.
trade the perfectly orange center with a flakier, pinker version and you should get the idea....ugh.

Beurre blanc sauce:
Shallots
White wine
White wine vinegar
Butter
Salt

Heat the shallots in a pan. Add a little white wine vinegar and some white wine. Reduce to 'au sec.' Remove the pan from heat and 'monte de beurre' or slowly whisk in butter. This sauce is very easy to break. High heat or adding to much fat too quickly will cause the emulsion to break and you will have to start from the beginning. 

Serve salmon with beurre blanc sauce and garnish with lemon and parsley.  

tragedy.

I am not even going to include the next recipe because it really is not very good and I will never make it again... and you should never make it for a first time. However, for the record....I actually completely messed this dish up in class today. I was so focussed on my overcooked salmon (clearly fish is not my forte.... 5/5 was nowhere to be written today) that I forgot to pull my sole out of the oven and actually ended up having all of my gross fish gravy evaporate during cooking. In a pinch.... I added a little clam juice to my left over beurre blanc and turned in my makeshift dish as the original and totally pulled it off. I am pretty sure I got a "wow, this actually tastes marvelous...." That is how culinary school is done